
⚡ Add this skill
One command
Agent onboarding
Fetch this skill when a customer already uses Botpress and wants its AI support agent to consume Autoplay live user activity.View the skill →
FetchEventsData pulls that user’s last 10 actions on demand straight from the Autoplay connector, then the Autonomous Agent answers using that context instead of generic replies.
There’s no separate listener process to run, no webhook integration to install, and no events table to maintain — the code node calls the Autoplay REST endpoint directly and synchronously, right when it’s needed.
What a returned action looks like — this is one entry from the actions array FetchEventsData gets back (see the code node below):
End-to-end walkthrough
This walkthrough was recorded against the older webhook-based setup, so the on-screen Webhook/Tables steps no longer apply — follow the workflow and code node instructions below instead. The finished-workflow shape (
Start → FetchEventsData → Autonomous Agent → End) and the Autonomous Agent configuration are still accurate.⚙️ Step 1 — Create the workflow
In Botpress Studio, create a new workflow with two nodes:
Connect them: Start → FetchEventsData → Autonomous Agent → End. That’s the entire workflow — there’s no webhook trigger node and no parallel path to wire up.
Code node: FetchEventsData
Paste this into the FetchEventsData code node. It calls the Autoplay live-activity endpoint directly with fetch() and exposes the result as workflow.agentContext — no tables, no background listener process.
data.actions comes back already ordered oldest → newest, so there’s no client-side sorting to do. summary is set to null on purpose — the Autonomous Agent’s system prompt below already treats a null summary as “no rolling summary available yet,” so nothing else needs to change there.
Autonomous Agent system prompt
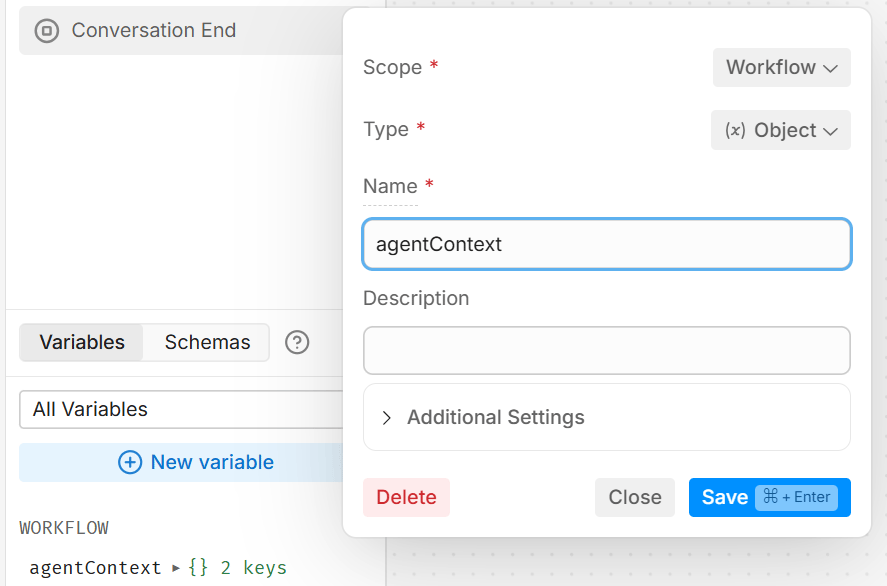
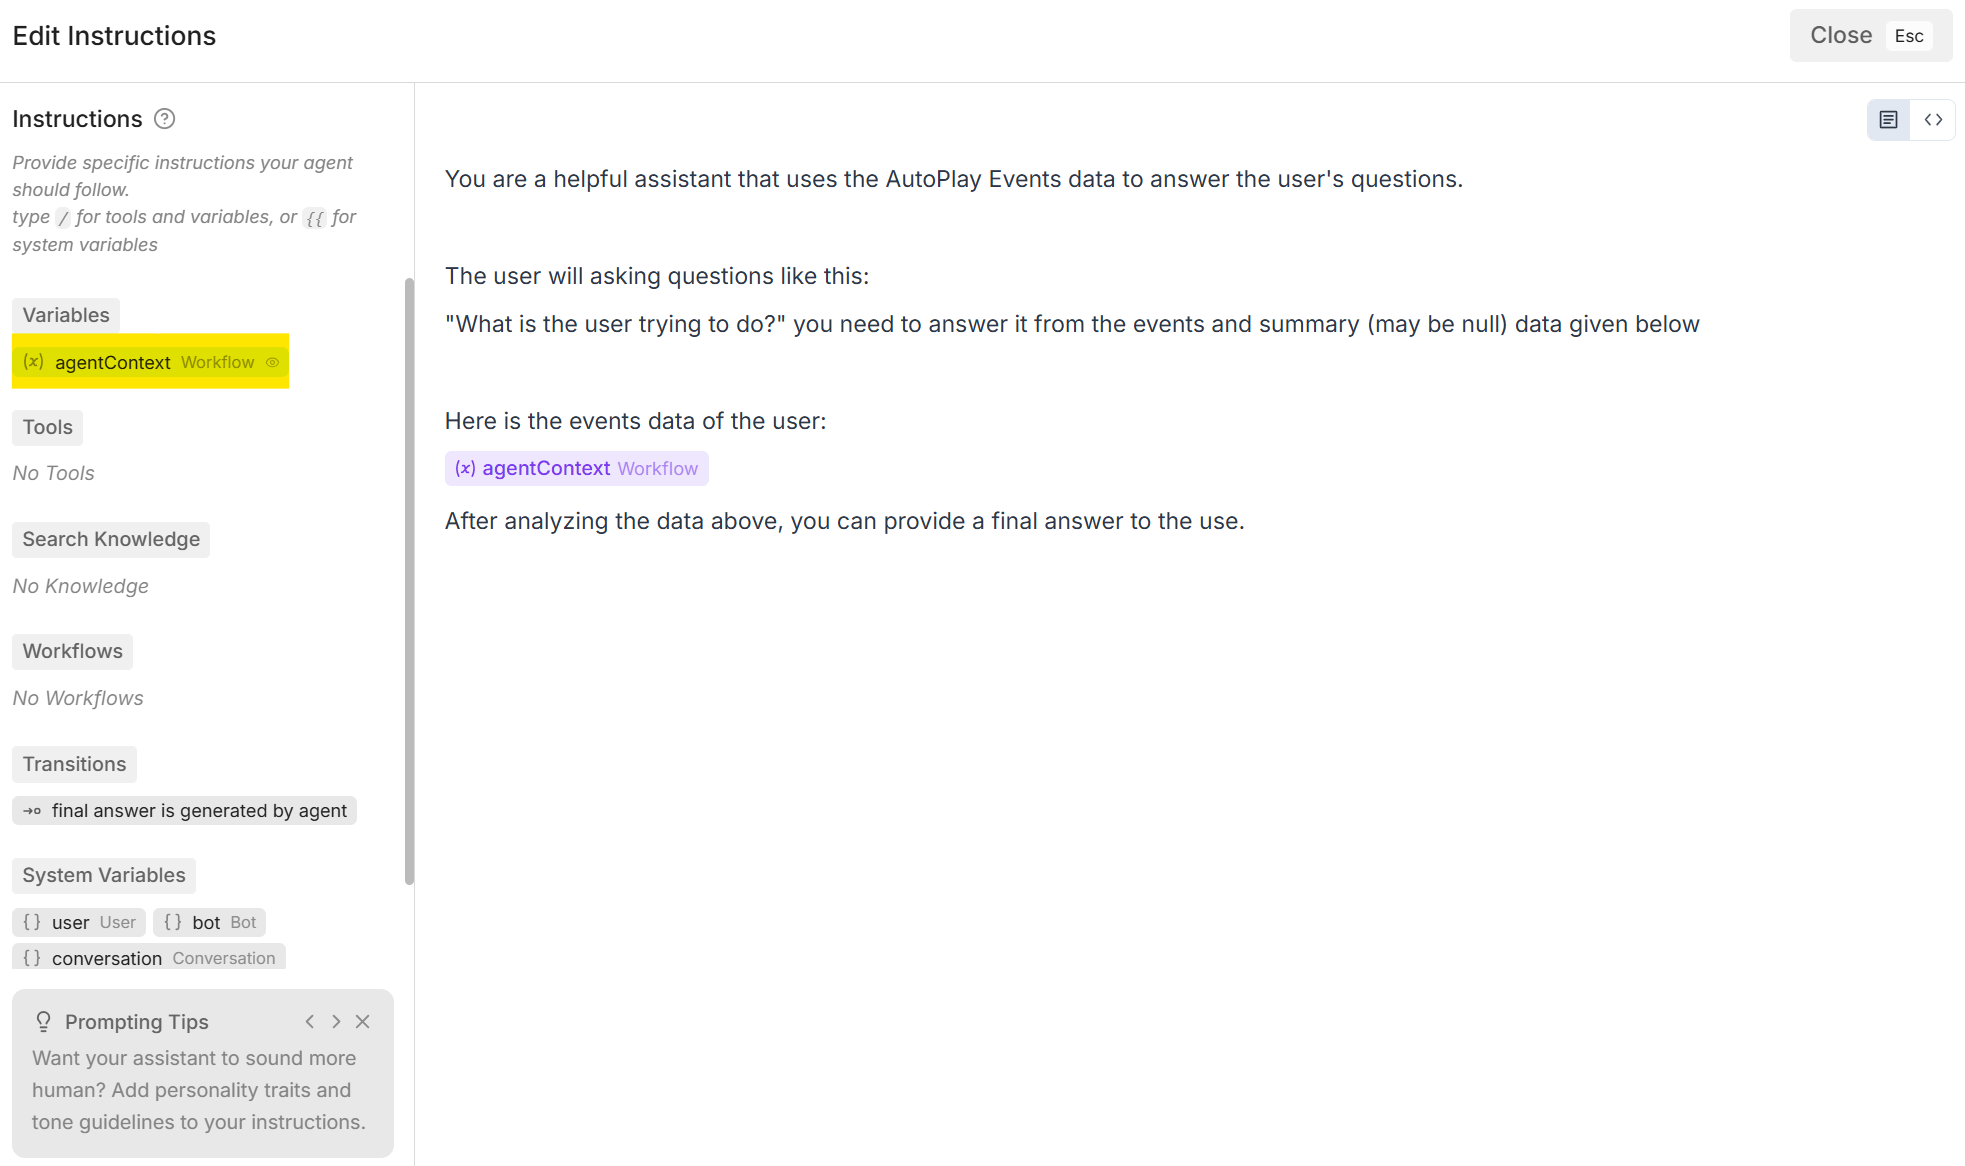
Before writing the system prompt, create a workflow variable calledagentContext (Scope: Workflow, Type: Object).
agentContext variable to inject it inline.
🔐 Step 2 — Match your Botpress user id to your activity source
FetchEventsData reads userId off the Botpress event (event.state?.user?.userId or event.userId, depending on which channel/integration you’re using to identify the visitor) and passes it straight through to the connector. That value must exactly equal the id your activity source uses:
- PostHog
- Amplitude
How the pieces fit: your frontend identifies the user in your activity source → Autoplay stores activity under that id → your Botpress channel/integration also sets the visitor’s stable id to the same value →
FetchEventsData reads it off event and passes it as userId in the connector call → the buckets match.✅ Test the full loop
- Log in to your app as a test user — fires your activity source’s identify call.
- Click around — visit a couple of pages, click a button, submit a form.
- Open the Botpress webchat (or Studio’s Preview panel) as that same identified user.
- Ask the agent: “What have I been doing recently?”
FetchEventsDatacalls the connector, the Autonomous Agent readsagentContext, and answers with what you actually just did.
- 401 / auth error in the code node logs →
MCP_KEYis missing or wrong — re-check the value against youronboard_productoutput. - Empty
actionsarray → identity is working but that user has no recent activity yet — browse around in your app first, then re-test. - Wrong user’s activity → the
userIdread insideFetchEventsDatadoesn’t match the id your activity source uses. Check both are identical.
Next: Step 2 — Define proactive triggers