⚡ Add this skill
One command
Agent onboarding
Fetch this skill when a customer already uses Landbot and wants its AI support agent to consume Autoplay live user activity.View the skill →
- Setup Landbot Workflow — Build the bot flow with a Webhook node and AI Agent.
- Setup Backend Server — Run a small FastAPI route that pulls a user’s live activity from Autoplay on demand, the moment Landbot’s webhook fires.
- Add support AI agent to Frontend — Embed the Landbot widget in your app.
🤖 Part 1 — Setup Landbot Workflow
The Landbot flow has five nodes wired together: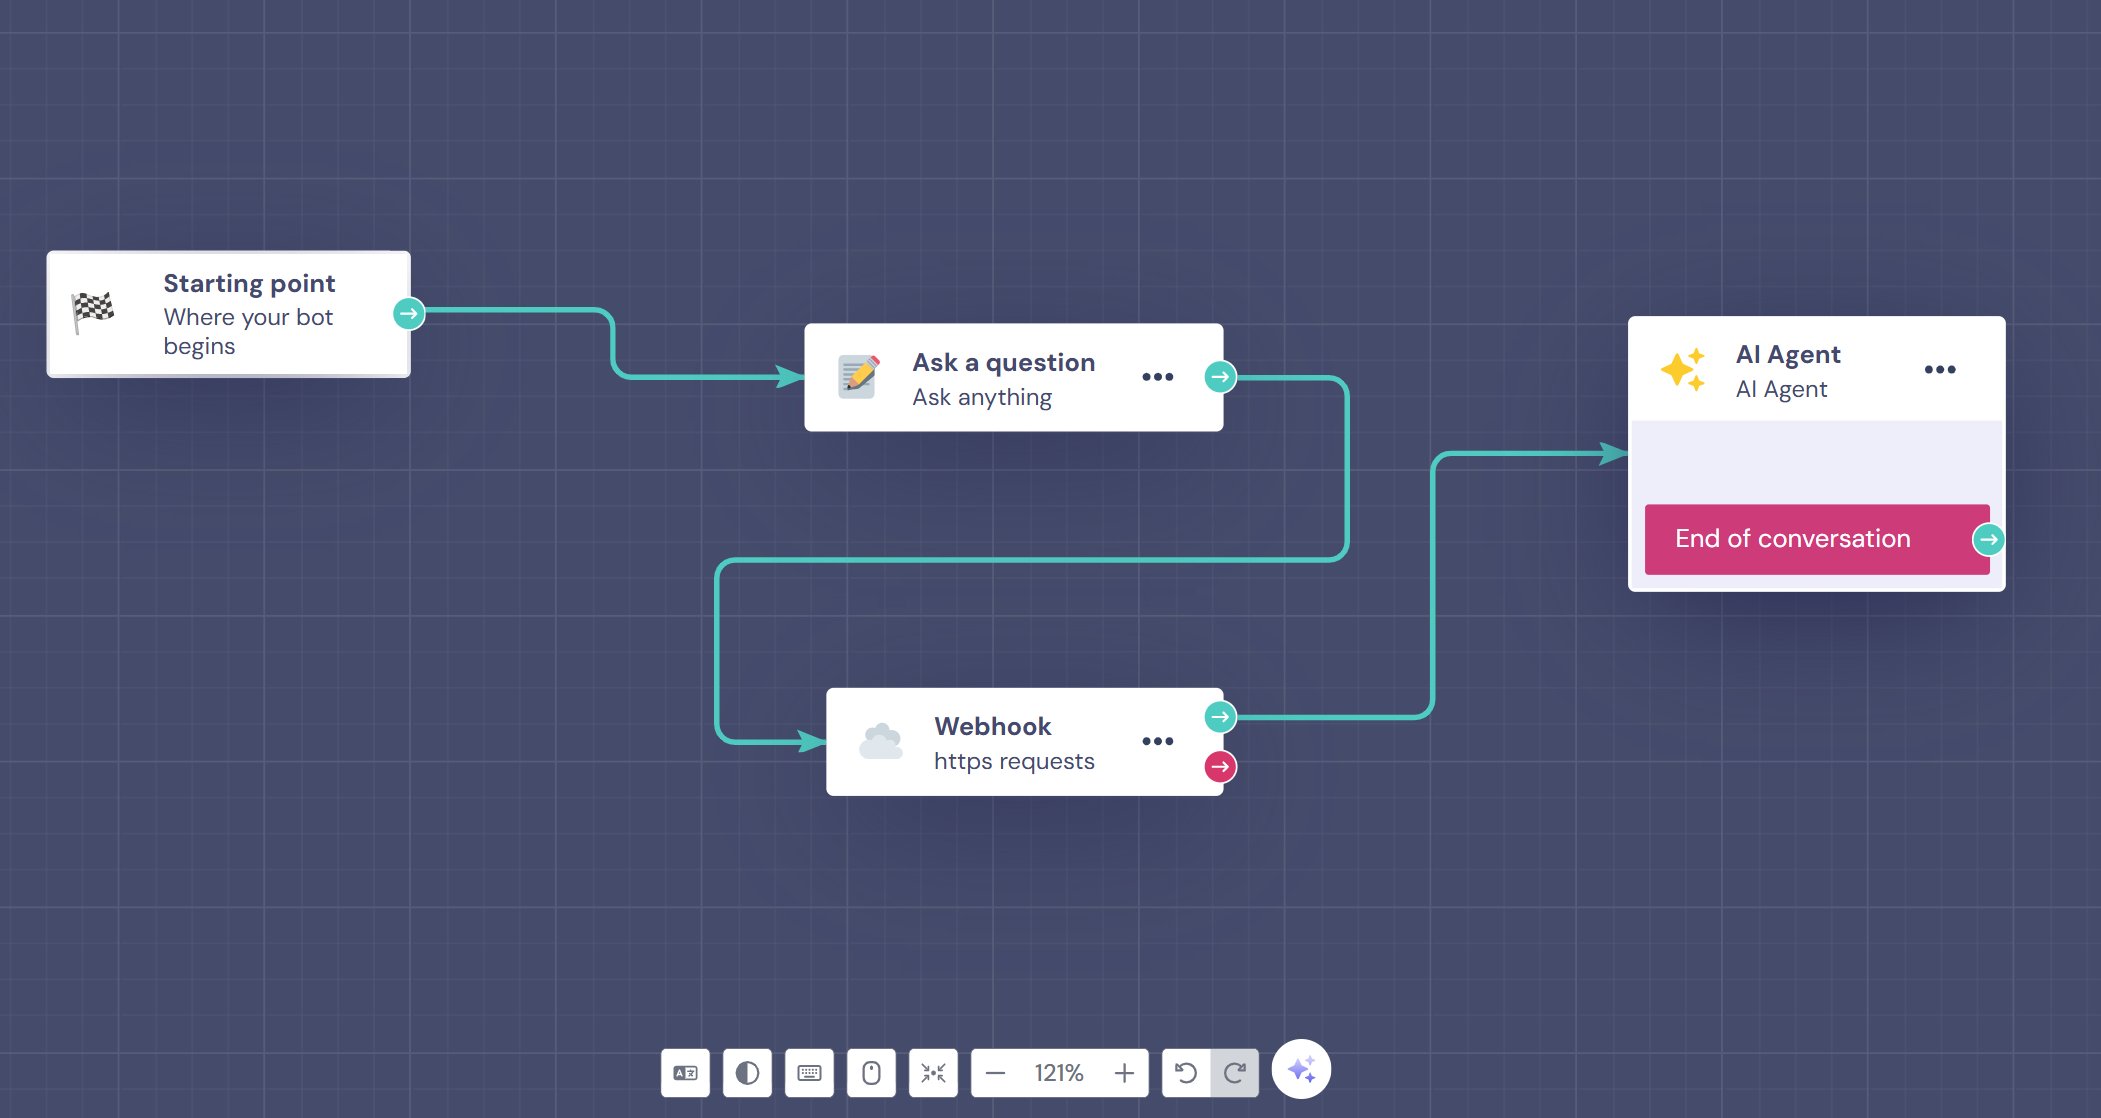
@context. The red arrow indicates an error/fallback path in case the request fails. You must connect this output to a fallback block — for example, a message block that says “Sorry, I couldn’t load your activity right now.” If the red output is left unconnected, the flow will break silently when the webhook fails.
4. AI Agent — This is the brain of the bot. It receives both the user’s question (from the Ask a Question block) and the live context fetched by the Webhook block, then generates an intelligent response. You configure its system prompt here to reference @context so it answers based on your real-time data.
5. End of Conversation — Once the AI Agent has responded, the flow terminates here. The conversation is closed and marked as complete in Landbot’s dashboard.
Webhook Node Setup
[@user_id] is a Landbot variable you set earlier in the flow — see Identity below for how to capture it before this block fires.
🔐 Identity — capture the user’s id
The live-activity read is keyed byproduct_id and user_id — there’s no session or stream to subscribe to, so every Webhook call must carry a stable user id, not just the shared WEBHOOK_SECRET.
Capture it in the flow before the Webhook block fires and store it as a Landbot variable (e.g. @user_id). A few ways to do that, depending on how your bot is deployed:
- Add an Ask a Question block earlier in the flow that asks for an email or account id, and save the answer as
@user_id. - If your bot only ever appears behind a login, use an existing Landbot system variable that already carries the logged-in identity (e.g.
@customer_idor@email), if your integration sets one. - If the widget is embedded in a logged-in app, pass the id in via Landbot’s URL params when you initialize the widget, and reference it the same way in the flow.
[YOUR_WEBHOOK_SECRET]:
@user_id must exactly equal the id your activity source uses:
- PostHog
- Amplitude
How the pieces fit: your app identifies the user in PostHog/Amplitude → Autoplay stores activity under that id → your Landbot flow captures the same id into
@user_id → the Webhook block sends it as a query param → your server’s /context route passes it straight through to the live-activity read → the buckets match.Map the Webhook Response to a Variable
After configuring your webhook URL and method, you must explicitly map the API response to a Landbot variable — otherwise@context will be empty when the AI Agent tries to use it. This step is required.
- Click Test the request inside the Webhook block to fire a live request to your server. You should see a 200 response with a
contextfield in the response panel on the right. - Click on the
contextvalue in the response panel. A tooltip will appear saying “Save this as a Field”. - In the “Save Responses as Fields” section that appears, create a new variable named
@context(type: Text). - Confirm the mapping. The
@contextvariable is now populated with the live data from your server each time a user sends a message.
Agent Setup
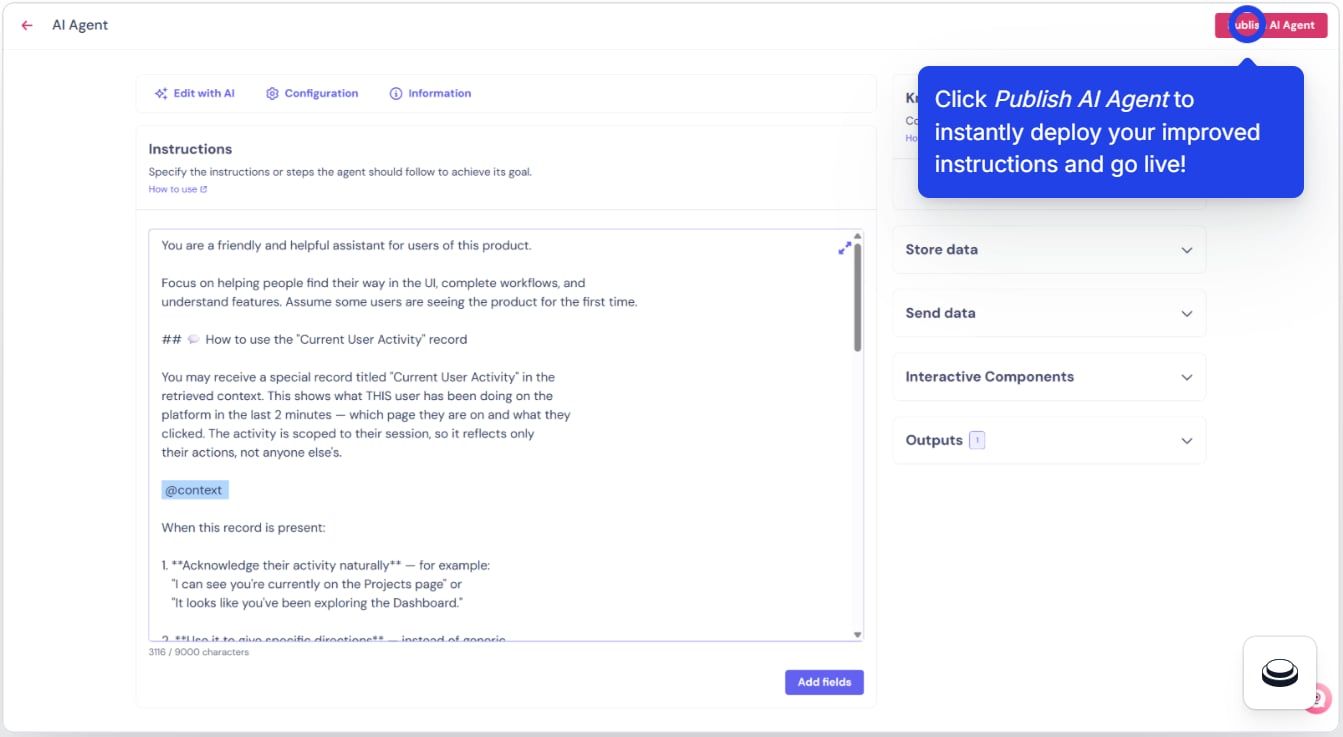
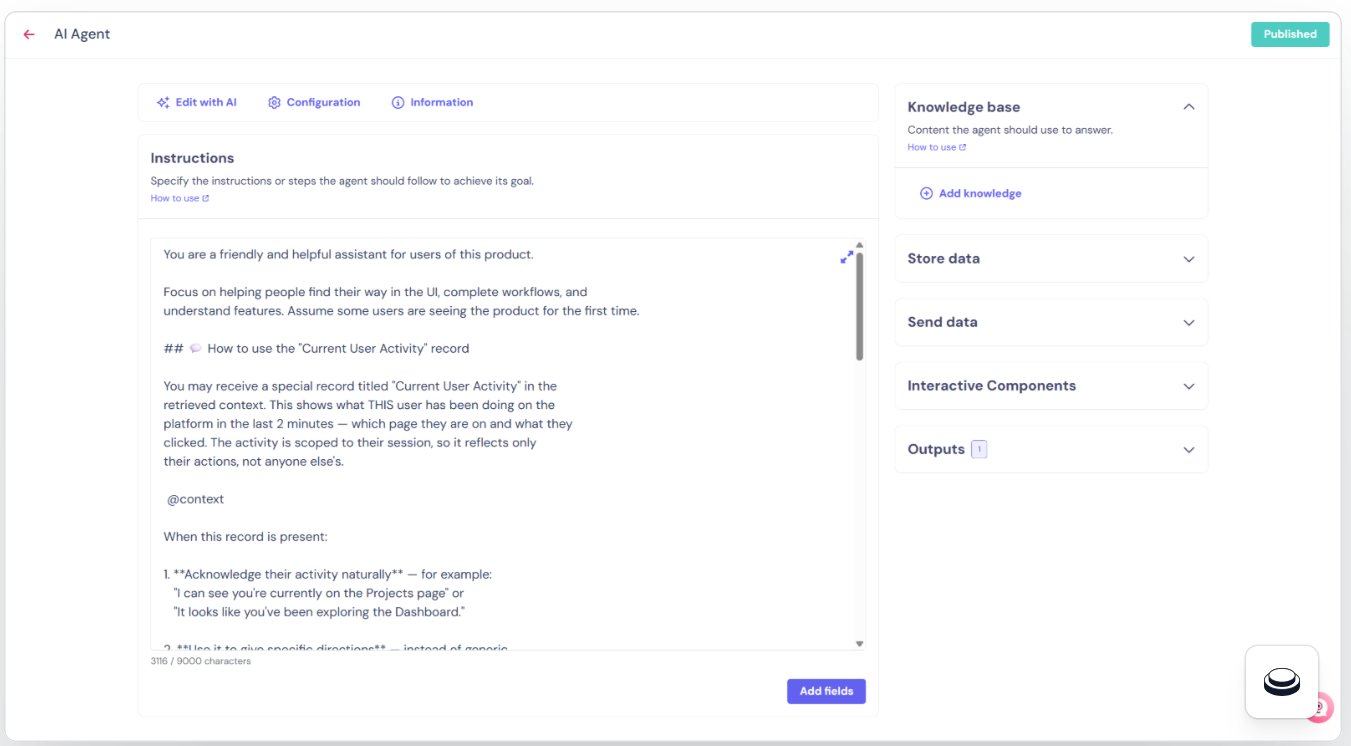
Agent Instructions- Select the agent — open the AI Agent node in your flow.
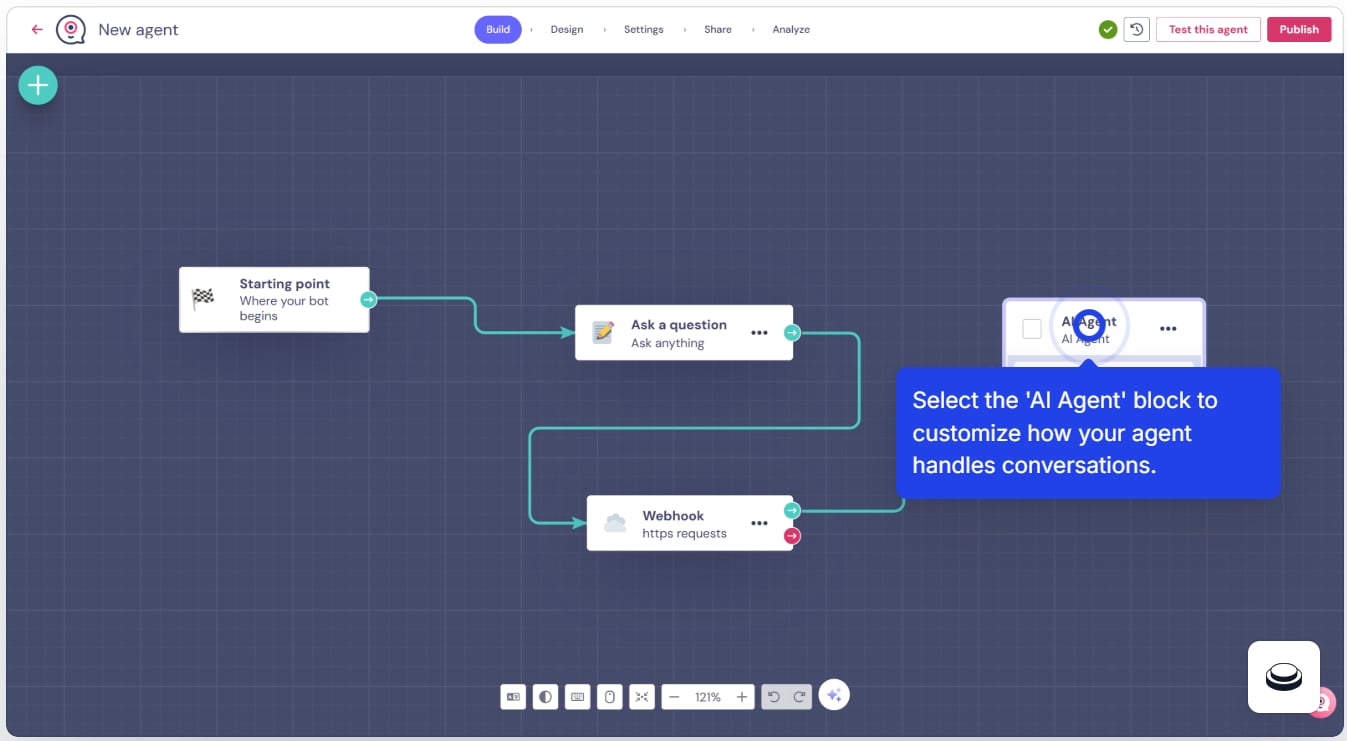
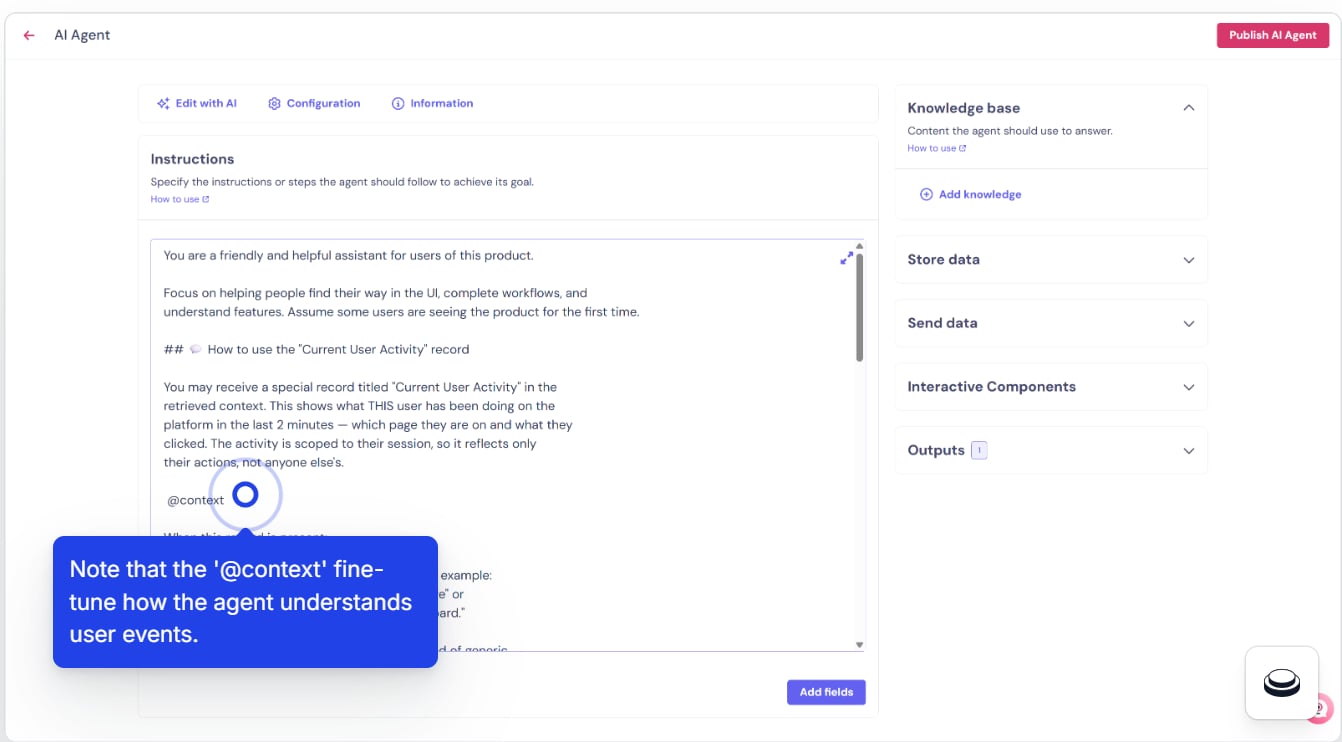
- Edit the Agent AI Instructions — paste the prompt above into the instructions field.
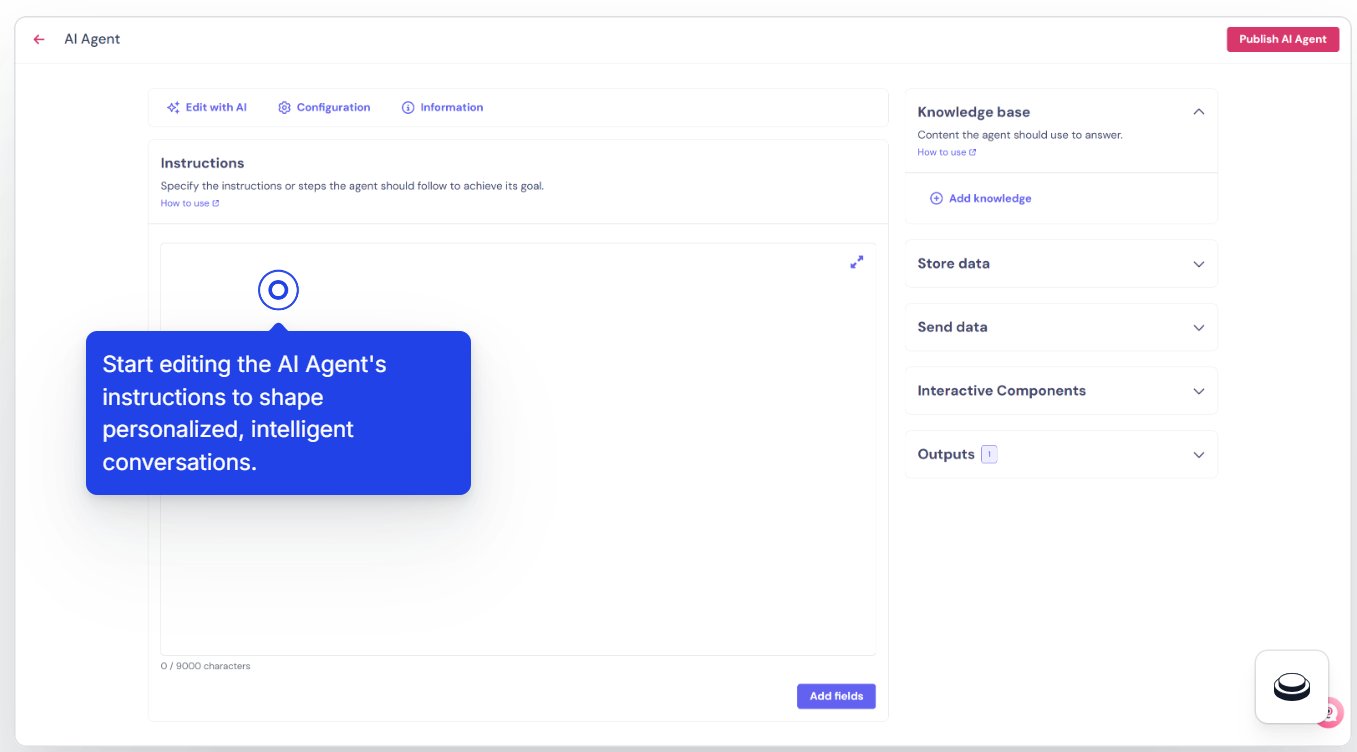
- Review the
@contextvariable — confirm it is injected where@contextappears in the prompt.
- Publish the flow — click the Publish button (top right of the flow builder) to make your changes live. Note that Save only saves a draft — you must click Publish for the bot to update. After publishing, confirm that your bot is assigned to a web channel so the embed snippet will work.
🐍 Part 2 — Setup Backend Server
There’s no background process to run anymore — the connector is pull-based. Your server calls the Autoplay live-activity endpoint synchronously, the moment Landbot’s webhook fires, and returns the formatted result straight back in the response.Prerequisites
- Python 3.10+
- A Landbot account
uvicornfor serving the FastAPI app- (Optional) Cloudflare Tunnel or Ngrok for local development
Project Structure
Setup your secrets in a .env file
CONNECTOR_URL— host that serves the live-activity read API,https://mcp.autoplay.ai(the origin of yourmcp_url, without the/mcppath)MCP_KEY— Bearer token for the live-activity API, themcp_keyprinted byonboard_productin the QuickstartPRODUCT_ID— your Autoplay product id, scopes the read to your product
WEBHOOK_SECRET is your own secret value — it can be any string, e.g. "DKFGEO293KDDA92". Use the same value in the webhook URL query param. It’s unrelated to MCP_KEY — this one only authenticates Landbot’s calls to your server.Setup the Webhook Server (server.py)
On every incoming Landbot webhook request, this route calls the Autoplay live-activity endpoint for the given user_id and formats the result for the AI Agent’s @context variable — no local file, no cache, no background listener.
user_id comes straight from the [@user_id] query param wired up in Identity above — the route passes it through unchanged to the live-activity read, so whatever Landbot sends is exactly what scopes the lookup.Run the server and expose it to the internet
Start the webhook server:[YOUR_SERVER_URL] in the Landbot webhook URL.
🌐 Part 3 — Add support AI agent to your Frontend App
In Landbot, click Share on your bot, then click the body button to copy the HTML embed code.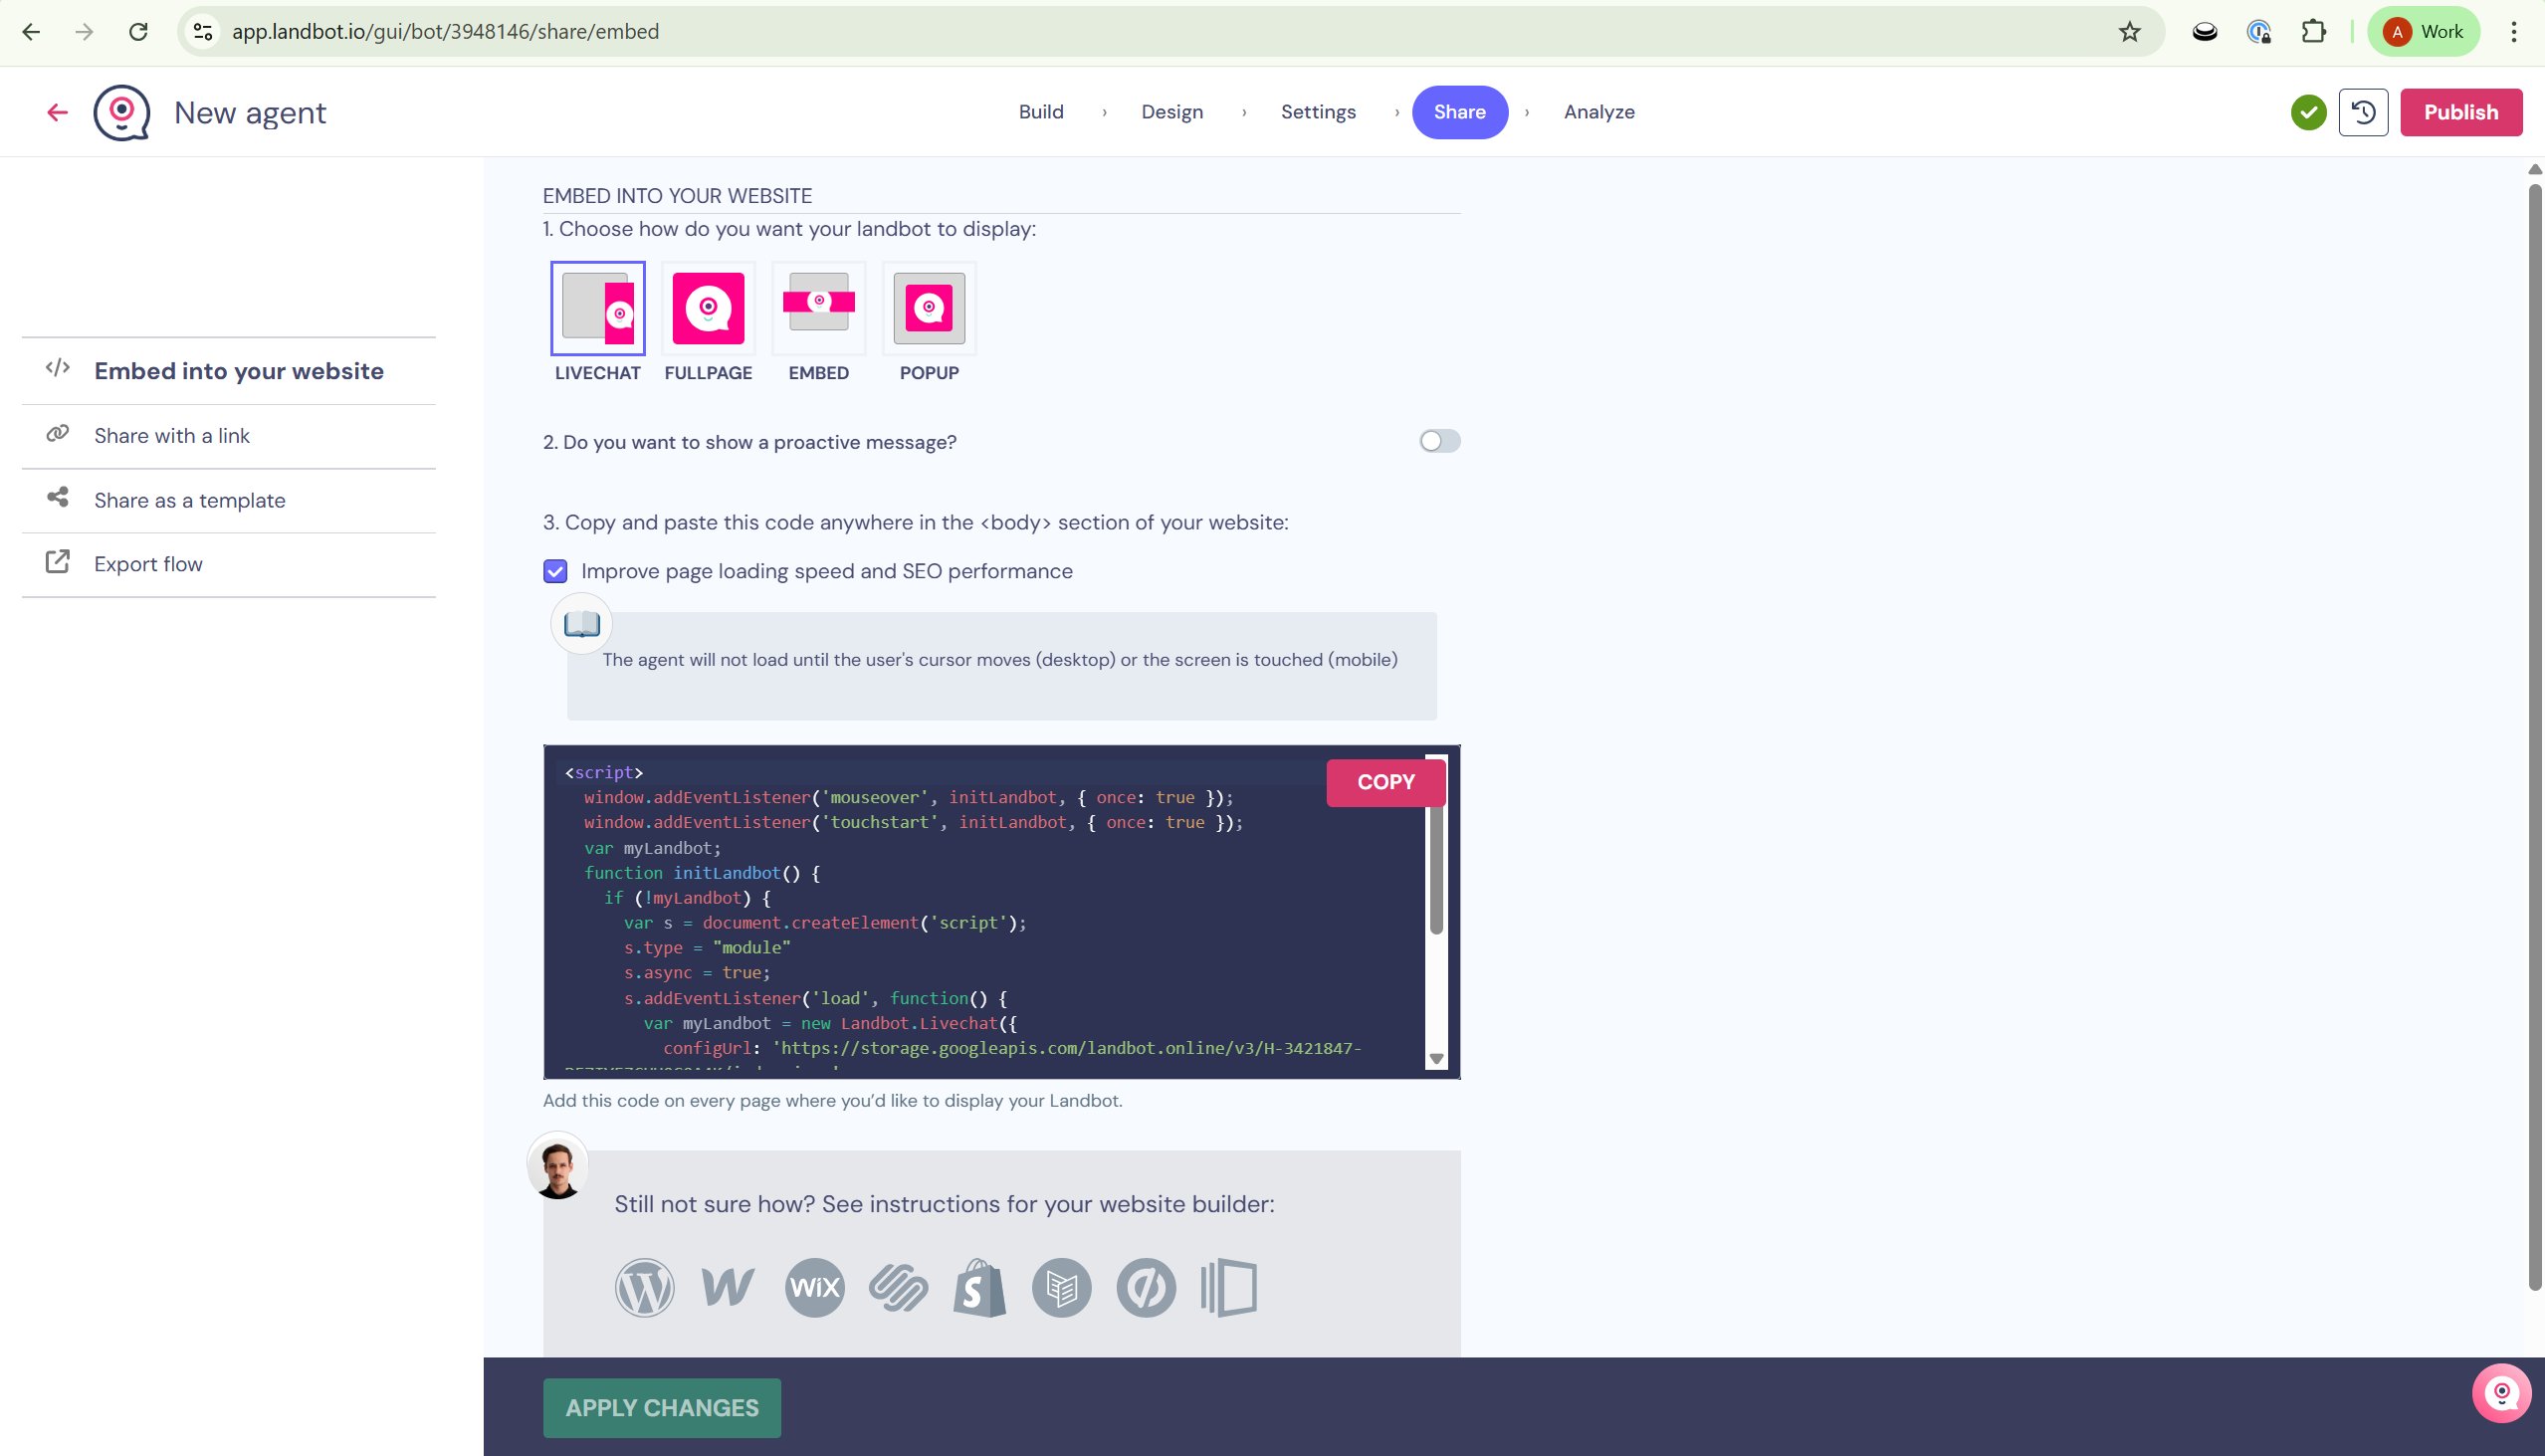
<body> of your frontend app’s index.html:
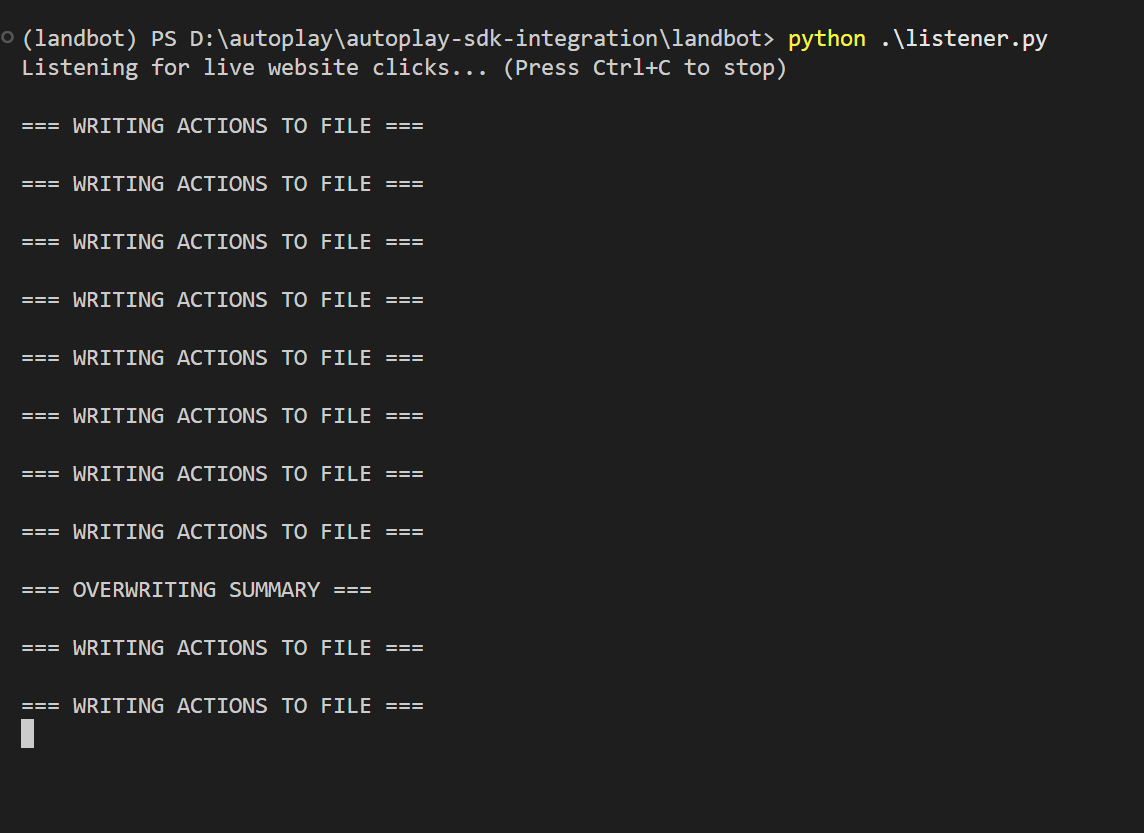
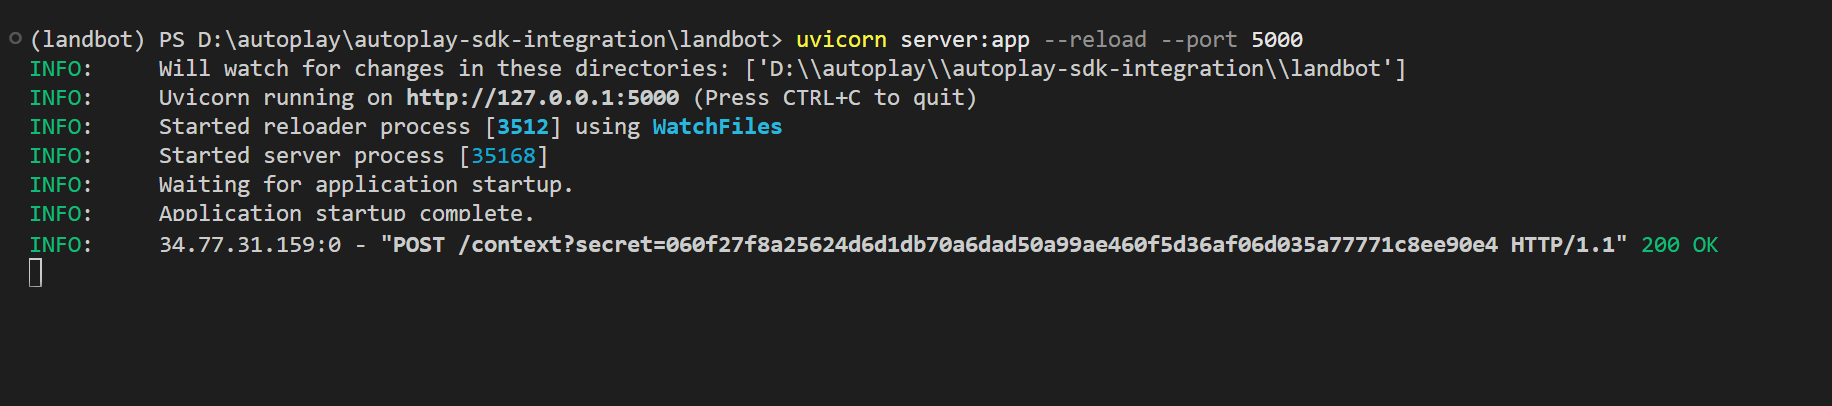
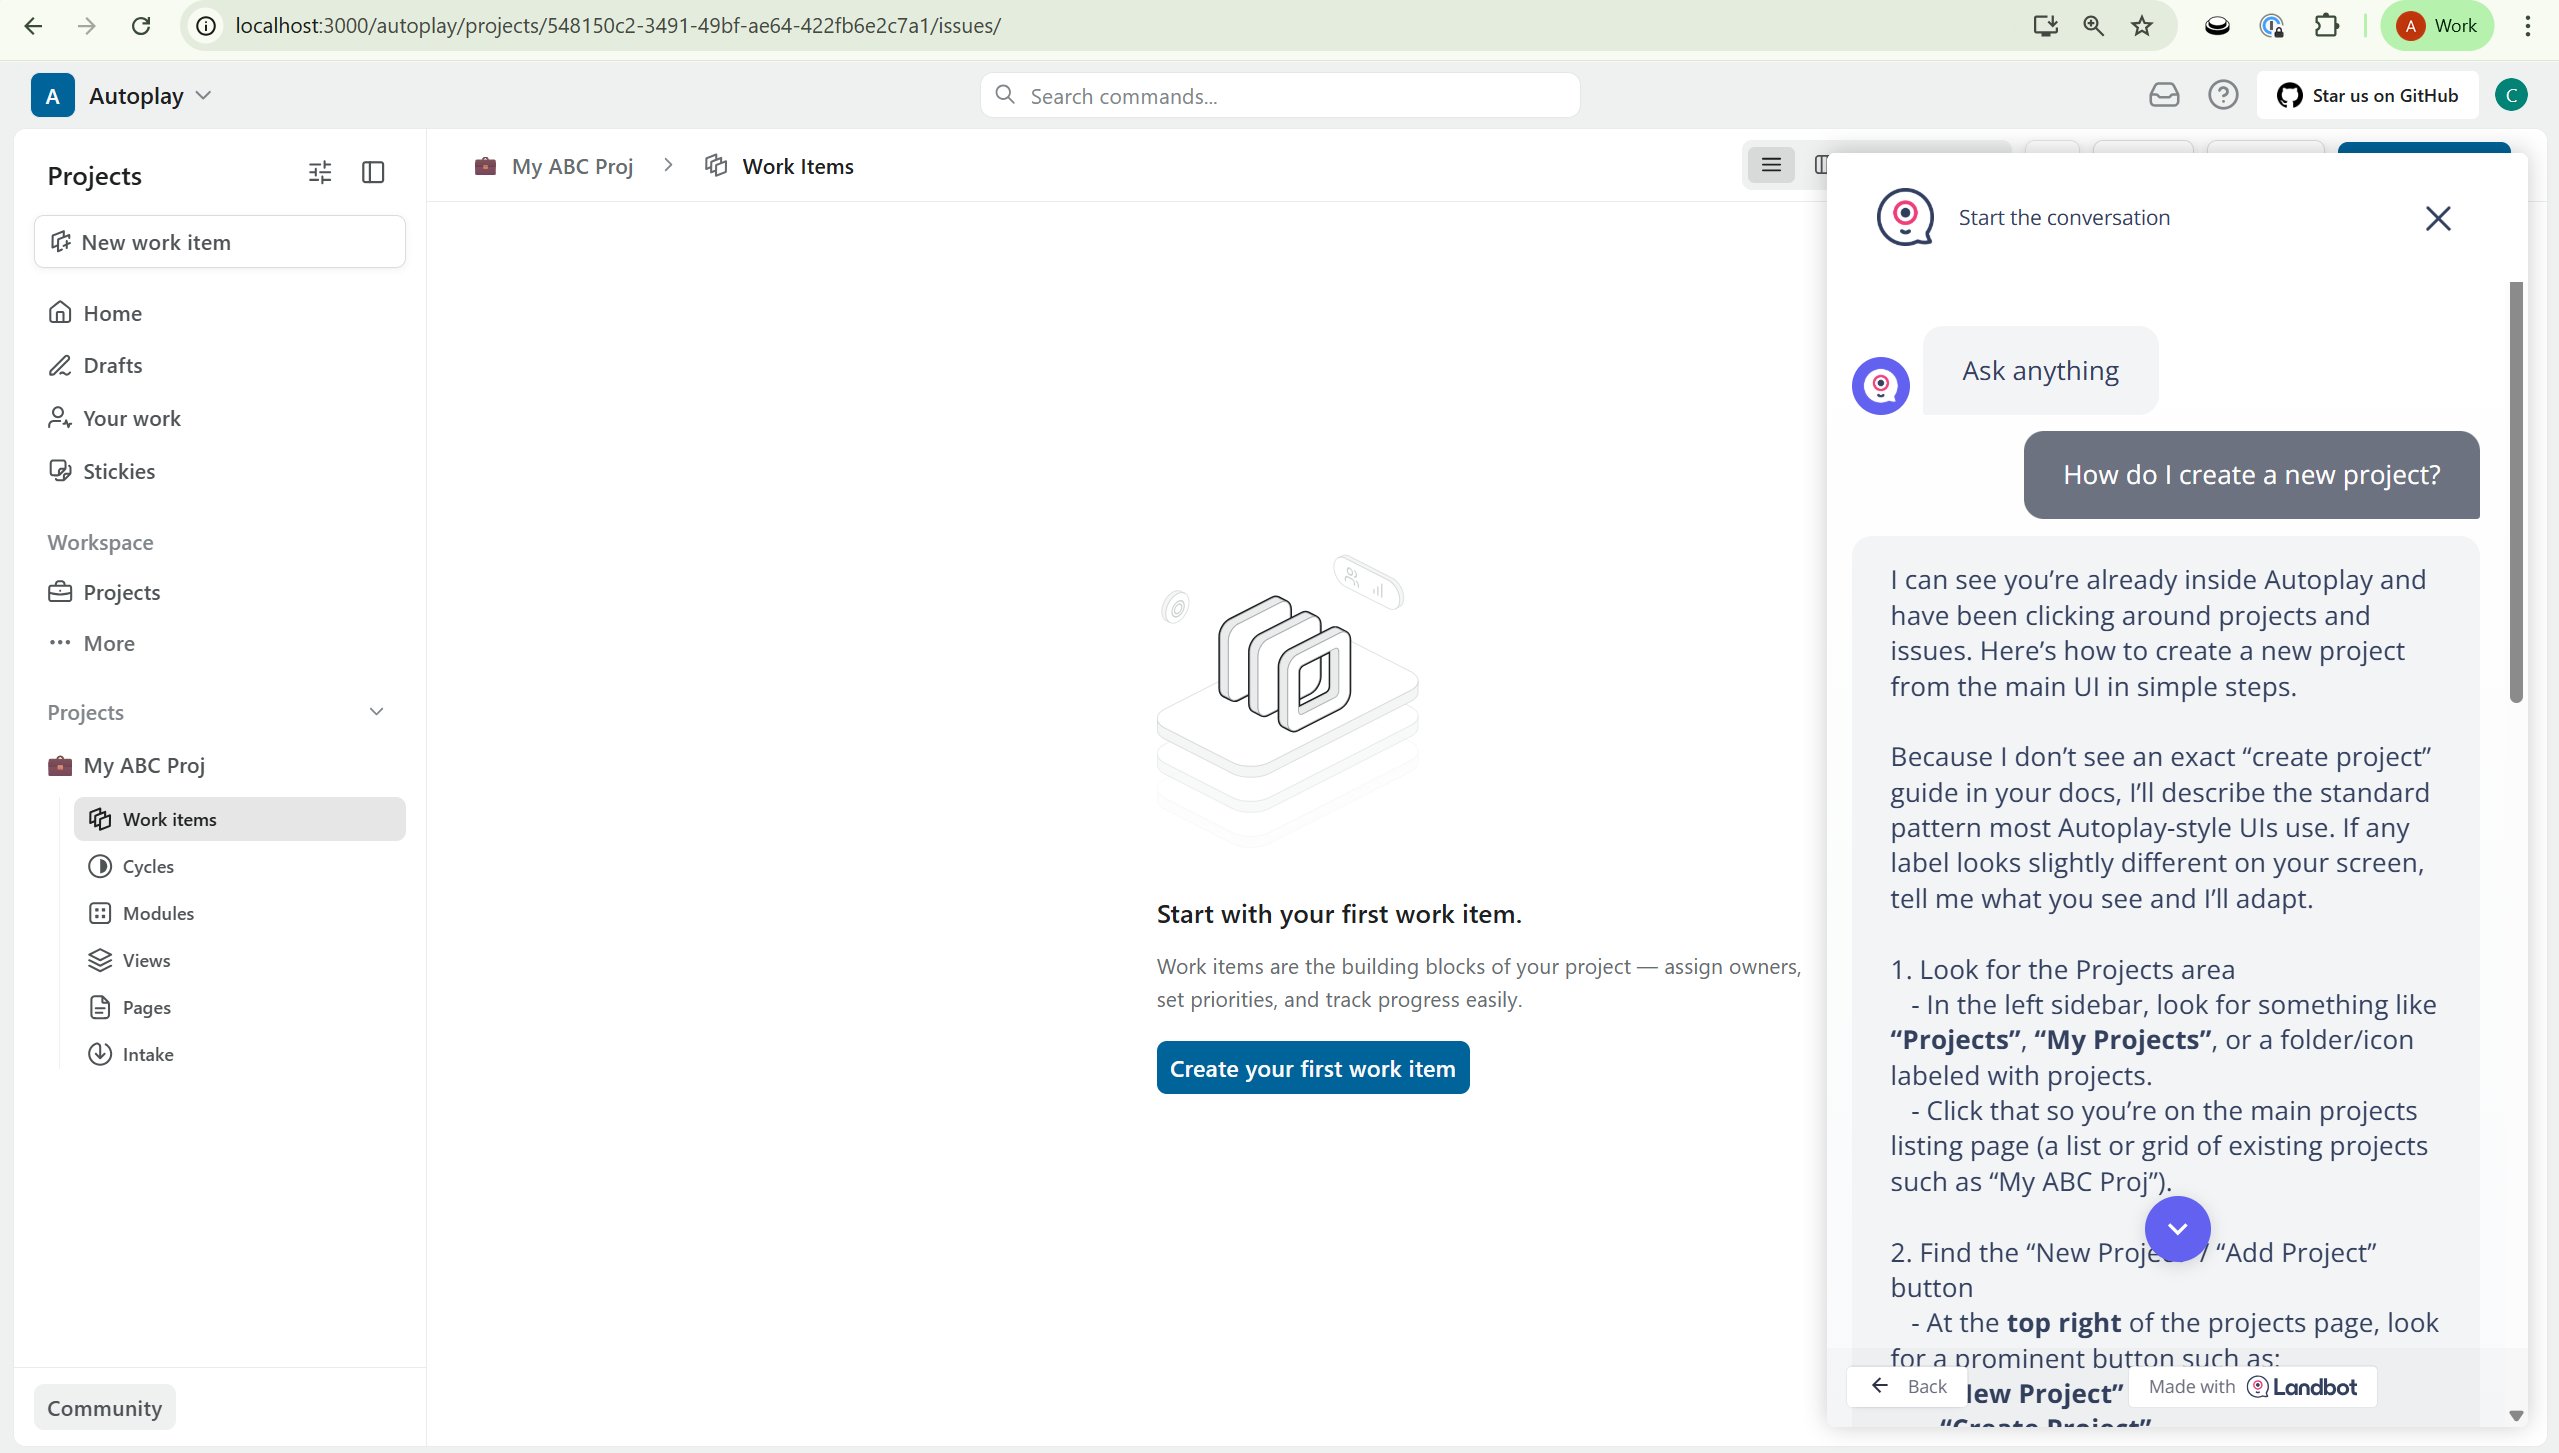
✨ Final result
After everything is running, you should see your server pulling live activity on each webhook call, and the Landbot support AI agent responding with real-time context.Server
Support AI agent
Next: Step 2 — Define proactive triggers